Ultimate Durostech Rapid Prototyping Approach Guide
Every product idea lives or dies by how fast it can go from mind to model. Yet one key step often flies under the radar: how quickly your team gathers real feedback on each prototype. Many teams rush into tooling without pausing to test small changes first. That speed bump can cost time and money in the long run. How can you avoid those hidden delays and keep innovation on track?
That’s where understanding the Durostech rapid prototyping approach really makes a difference. By breaking each phase into bite-sized iterations, you spot issues early and refine designs on the go. It’s a clear roadmap that cuts both surprises and rework. With that insight, you make smarter choices and hit deadlines with confidence.
Why Quick Prototyping
In any product project, time is your most precious resource. Rapid prototyping means you get a working model in hand fast. That early version helps you see whether your idea actually holds water.
When you move quickly through prototypes, you can test new elements often. Instead of waiting months for a final build, you learn what works and what doesn’t. This keeps everyone on the same page and reduces costly missteps.
Practical tip: set a goal for each prototype cycle. Maybe you only test fit and form in one round. In the next, focus on functionality. Clear aims help you stay on track and avoid scope creep.
Fast prototypes also keep stakeholders engaged. A live model speaks louder than a slide deck. When teams see progress in days, they stay motivated and ready to share honest feedback.
Iterative Modeling Techniques
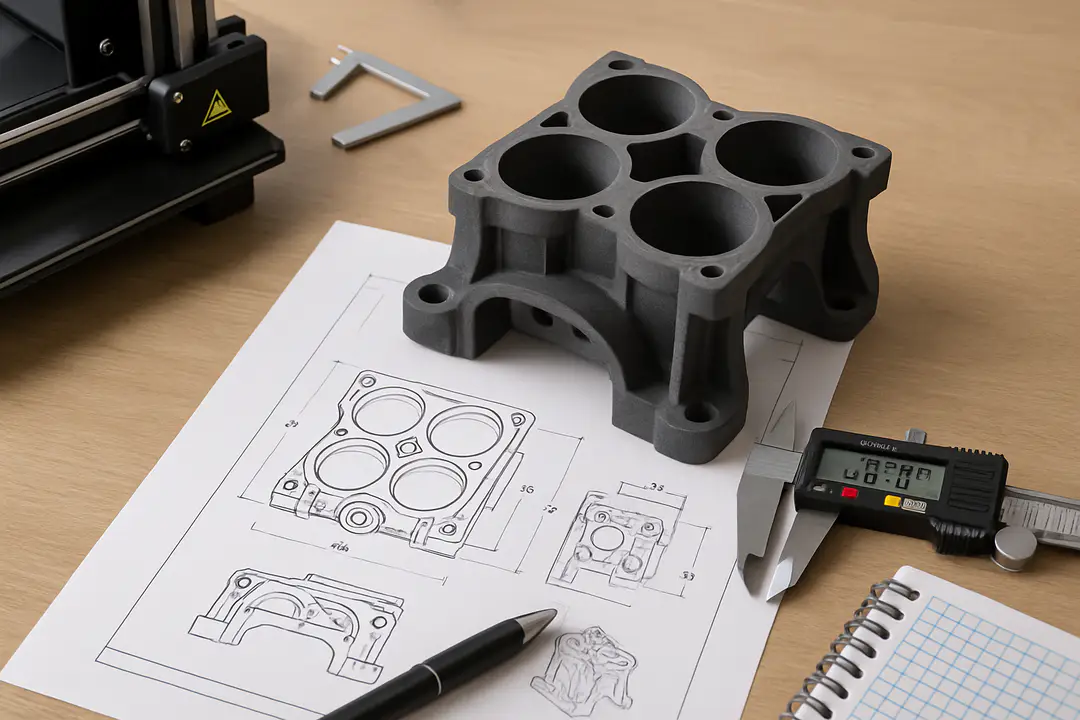
Iterative modeling is at the core of Durostech’s approach. You start with simple sketches or basic 3D models. Then you refine those models step by step.
Digital CAD tools let you test dozens of design tweaks without building anything physical. Once you lock in key features, you move to a quick print or CNC cut. This blend of digital and physical checks catches errors early.
If you need extra help, Durostech’s tech help page offers guides and tips on best practices. They walk you through file prep, model scaling, and material choices.
Simple tip: use existing CAD libraries to speed up initial models. You don’t need to design every nut and bolt from scratch. Pull in standard parts to save hours of work.
Once you print or mill your first version, test it under real conditions. Measure wear, fit, and performance. Feed those findings back into your digital file before the next round.
Managing Feedback Loops
Feedback loops tie rapid prototyping together. Without clear input, you risk chasing the wrong changes. The Durostech approach sets up regular check-ins to keep everyone aligned.
Start by gathering feedback from engineers, designers, and end users. Use simple forms or quick video calls to capture reactions. Then log notes in a shared system so nothing falls through the cracks.
Using specialized team collaboration tools helps you track version changes and assign tasks. You can link comments to specific model revisions and set deadlines for fixes.
Practical tip: limit feedback rounds to key decision makers. If too many voices weigh in, you can slow progress. A small, focused group moves faster and makes clear choices.
At each cycle end, review all feedback as a team. Agree on which ideas move to the next build. Document rejected suggestions so you don’t lose valuable insights.
Material Selection Basics
Choosing the right material can make or break a prototype. Durostech’s method tests common options before final tooling. You want to see how real materials look, feel, and hold up.
A quick list of popular prototyping materials:
- PLA Plastic: great for simple, low-cost prints and form checks.
- ABS Plastic: tougher than PLA, better for testing heat resistance.
- Resin: ideal for fine detail and smooth surfaces.
- Aluminum: used for functional parts that need strength.
- Foam Board: fast for rough mockups and ergonomic studies.
Tip: don’t overthink the first material. Grab a cheap, easy option to test shape and basic fit. Save expensive runs for later stages when you test load and performance.
For each material, record build time, cost, and any finish steps. This data helps you pick the right candidate for final tooling.
Material tests also reveal hidden issues. You might see warping in ABS or brittleness in resin. Catch those early so you avoid costly failures down the line.
Integrating Manufacturing
Bridging prototypes to manufacturing is crucial. Durostech’s approach keeps that handoff smooth by planning for how parts will be made at scale.
Start each cycle with the end in mind. Choose materials and tolerances that map to real factory processes. That way, you avoid redesigns when you move to molds or CNC runs.
Keep an eye on Durostech’s latest updates for new features that smooth production handoffs. Those tools can automate file exports in formats your shop needs.
Tip: share production specs—like tolerances and surface finish—with your prototyping team. Clear standards reduce guesswork and speed up final reviews.
Also, test small batches on the actual machine you’ll use for full runs. Finding a tweak early on a handful of units saves big delays later.
Scaling Production
When your prototype checks all the boxes, you push toward larger runs. Durostech’s model scales smoothly from one-off prints to mass production.
Compare how small batches differ from full-scale output:
| Aspect | Small Batch | Mass Production |
|---|---|---|
| Tooling Time | 1-2 weeks | 4-6 weeks |
| Cost per Unit | $50-$100 | $5-$10 |
| Lead Time | 2-3 weeks | 8-10 weeks |
This comparison shows why rapid steps matter. You avoid long waits by catching design flaws before big molds are cut.
Tip: keep your digital files organized and versioned. As you scale, changes become more expensive. A clear history of revisions saves you from costly redo.
Durostech’s playbook also suggests pilot runs—small, real-world tests before full volume. That pilot run is your final check point.
Conclusion
The Durostech rapid prototyping approach puts speed, clarity, and quality at the heart of development. By breaking work into small iterations, you spot issues early and keep everyone on target. Material tests, feedback loops, and planning for manufacturing handoffs all play a key role.
Remember to set clear goals for each prototype, choose the right materials, and use the right tools to gather feedback. Check helpful resources like technical guides or team collaboration tools whenever you need a hand. When you follow this approach, you will save time, cut costs, and bring better products to market with confidence.
Ready to put this method into practice? Start your first prototype cycle today and see how quickly you can turn your next idea into reality.