

How to Host a Bluesky Pds: Self-hosting Setup Steps
How to host a Bluesky PDS starts with three things: a server you control, a domain name you can edit, and the discipline to keep the service patched and backed up. A Personal Data Server, or PDS, is the account host for the AT Protocol, which powers Bluesky. Running your own gives you more control over your identity, data location, and service policies, but it also makes you responsible for uptime, TLS, DNS, storage, and security.
A self-hosted Bluesky PDS relies on official deployment steps, careful planning, and ongoing maintenance after launch. It focuses on the practical setup work, the network and security choices that matter most, and the maintenance tasks you need to keep the server healthy after it goes live.
Introduction to Bluesky PDS
A Bluesky PDS is the server that stores account data and signs activity for users on the AT Protocol. In simple terms, it is the home for a Bluesky identity. If you use a hosted provider, that provider runs the infrastructure. If you self-host, you run the account server yourself and connect it to your own domain.
Why people host their own
Self-hosting matters because it gives you direct control over account hosting, storage, and operational policy. You decide where data lives, when updates happen, how logs are retained, and what access rules apply. That is especially useful for developers, small communities, and admins who want a decentralized setup without handing every layer to a third party.
What the process involves
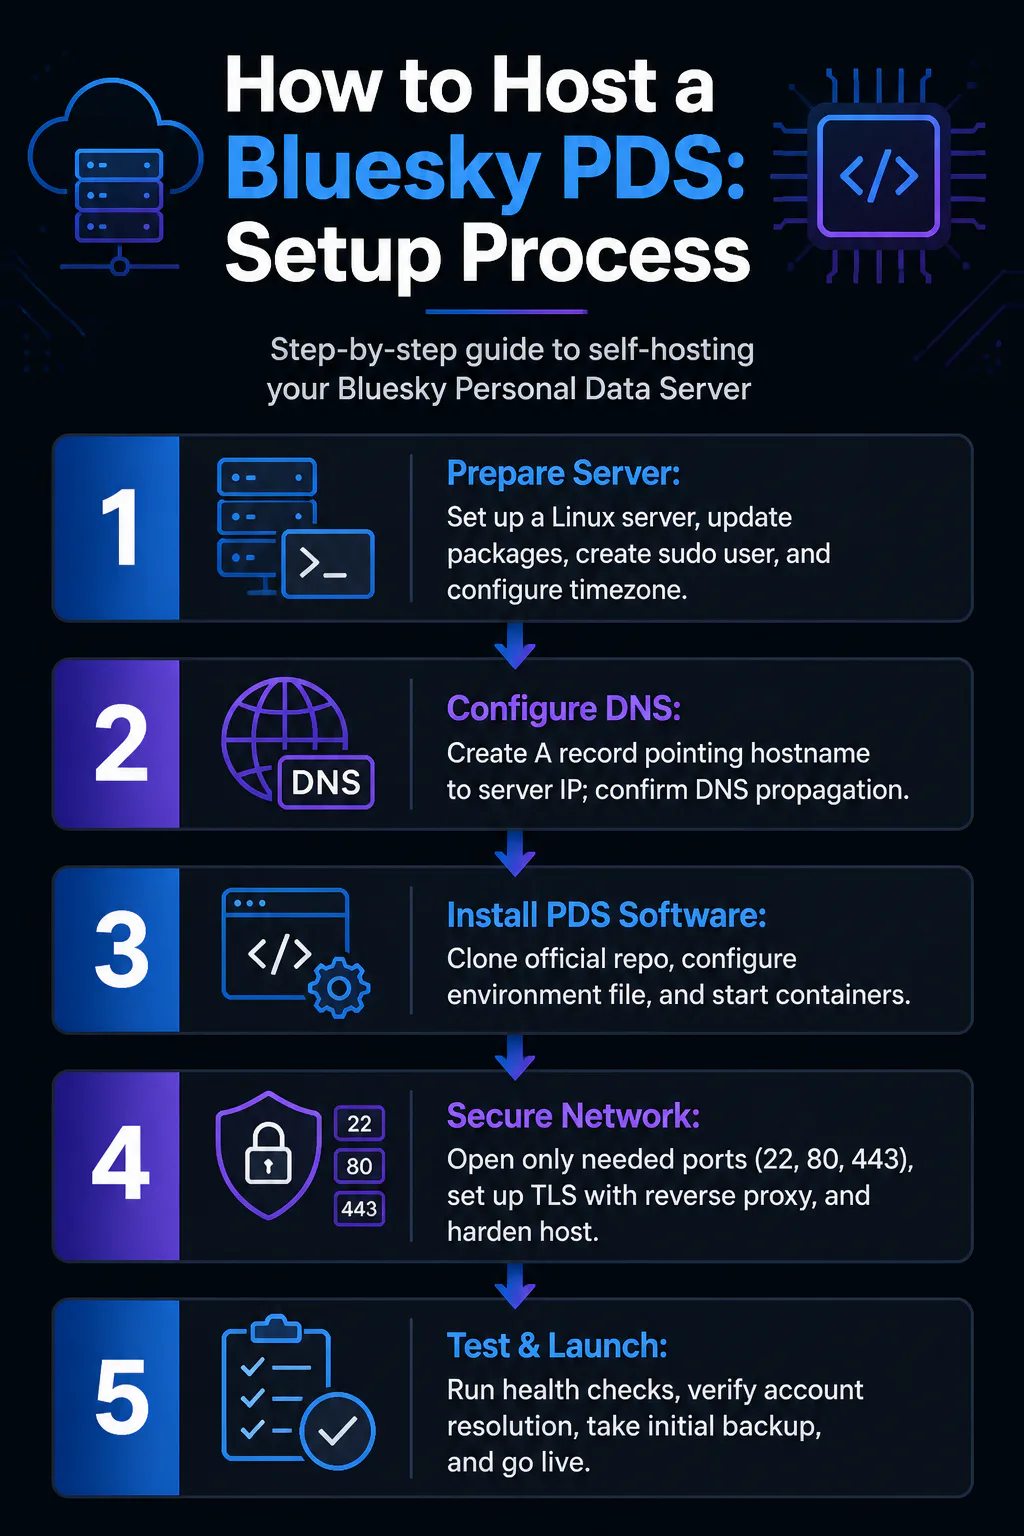
The actual work is straightforward if you break it into stages. You prepare a Linux server, point DNS records at it, install the official PDS software and its dependencies, configure environment variables, secure the host with a firewall and TLS, then test account resolution and service health before opening it to regular use.
Security is part of the setup, not a final add-on. Your host should use HTTPS only, strong admin credentials, a minimal firewall policy, and regular updates. If you already follow a disciplined patch cycle for software updates, that same habit will save you from the most common self-hosting failures.
Know the trade-offs
Hosting your own PDS is not the same as installing a casual web app. If the server goes down, account actions can fail. If your storage is lost and you have no backup, data recovery becomes difficult. If DNS or TLS breaks, clients may not resolve your service correctly.
That is why the safest approach is to start small: one server, one domain, one well-documented deployment. Once it is stable, you can add monitoring, off-site backups, and stronger hardening.
Prerequisites
Core requirements
- A Linux VPS or dedicated server with root or sudo access
- A domain or subdomain you control, such as pds.example.com
- Public IPv4 access and working DNS management
- Docker and Docker Compose support, if using the official containerized deployment path
- Persistent storage for account data and logs
- TLS certificates through a reverse proxy or automated certificate tool
Recommended baseline
| Component | Minimum | Recommended |
|---|---|---|
| CPU | 2 vCPU | 2 to 4 vCPU |
| RAM | 2 GB | 4 GB |
| Storage | 20 GB SSD | 50 GB SSD or more |
| OS | Ubuntu LTS | Current Ubuntu LTS |
| Network | Static public IP | Static IP with reverse proxy |
Before you begin
- Create a non-root administrative user
- Decide whether the PDS will sit directly on the host or behind Nginx or Caddy
- Set an email address for TLS renewal notices
- Plan a backup target before the first real account is created
Step 1: Setting Up Your Server Environment
Prepare the operating system
- Deploy a fresh Ubuntu LTS server from your cloud provider.
- Log in as root, create a sudo user, and disable password login if you use SSH keys.
- Update the system packages with your package manager before installing anything else.
- Set the server timezone and confirm system time is correct.
Install base packages
- Install Docker Engine and the Compose plugin from the vendor-supported repository.
- Install common admin tools such as curl, ufw, and jq.
- Enable Docker to start on boot.
- Create a directory for your PDS deployment, such as /opt/bluesky-pds.
Configure DNS early
- Create an A record for your chosen hostname and point it to the server IP.
- Wait for DNS propagation and confirm it with dig or nslookup.
- Choose whether the hostname will terminate TLS directly or through a reverse proxy.
At this stage, avoid piling on unrelated tooling. A clean deployment is easier to troubleshoot than a host cluttered with side projects, the same reason developers keep isolated software python environments instead of mixing everything into one system path.
Step 2: Installing the Bluesky PDS Software
Use the official repository
- Go to the official Bluesky or AT Protocol documentation and locate the current PDS self-hosting repository and setup instructions.
- Clone the repository into your deployment directory.
- Review the sample environment file and deployment notes before starting containers.
Create your environment file
- Copy the example environment file to a live .env file.
- Set the public hostname, admin contact details, and storage paths.
- Generate strong secrets for service keys, JWT values, and any admin tokens the stack requires.
- Set database or internal service values exactly as documented by the official project.
Start the services
- Run the container compose command from the project directory.
- Pull the images and start the stack in detached mode.
- Check logs for startup errors, especially missing environment values, file permission issues, or port conflicts.
- Confirm that the PDS process is running and listening on the expected internal port.
If the documentation offers a helper script for first-run setup, use it exactly as written. Do not substitute community snippets from random posts, because unofficial install shortcuts are the fastest path to broken permissions, wrong environment variables, and hard-to-track launch failures.
Step 3: Configuring Network and Security Settings
Open only required ports
- Allow port 22 for SSH, ideally from restricted source IPs.
- Allow ports 80 and 443 for web traffic and certificate issuance.
- Block every other inbound port unless a documented service needs it.
Set up TLS
- Install a reverse proxy such as Caddy or Nginx if your deployment expects external TLS termination.
- Request and attach a valid certificate for your PDS hostname.
- Redirect all HTTP traffic to HTTPS.
- Test certificate validity from an external network.
Harden the host
- Disable root SSH login.
- Use key-based authentication only.
- Enable automatic security updates where appropriate.
- Store secrets outside public repositories and restrict file permissions on the .env file.
- Set up fail2ban or equivalent login protection if SSH is exposed publicly.
Remote administration from public networks is safer through encrypted routing, and some admins prefer a VPN for mobile workflows on secondary devices rather than opening broad management access. The principle is the same here: reduce exposed surfaces and keep admin paths private wherever possible.
Step 4: Testing and Launching Your PDS
Run basic health checks
- Check container status and confirm all required services are healthy.
- Open the public hostname in a browser and verify the certificate chain is valid.
- Use curl against the documented health or status endpoints, if provided.
- Review startup logs for warnings before creating a production account.
Verify account resolution
- Create or migrate a test account following the official account-hosting instructions.
- Confirm that the account resolves through the expected hostname.
- Verify basic actions such as sign-in, profile edits, and posting through the client you plan to use.
Go live carefully
- Take an initial backup after the first successful setup.
- Document your DNS, environment variables, storage paths, and recovery steps.
- Only then move regular use to the self-hosted PDS.
Maintenance
Ongoing maintenance
- Patch the host OS on a regular schedule.
- Update container images only after reading the release notes.
- Renew and monitor TLS certificates.
- Back up data directories, configuration files, and secrets to an off-site location.
- Watch disk usage so logs or media do not fill the volume.
- Use uptime monitoring for the public hostname and key endpoints.
Common problems
- DNS record points to the wrong IP
- Reverse proxy forwards to the wrong internal port
- Certificate issuance fails because port 80 is blocked
- Containers restart due to missing or malformed environment variables
- Data volume permissions prevent the service from writing
- Clock drift causes token or certificate validation errors
Recovery habits
- Test restores, not just backups.
- Keep a copy of your deployment notes outside the server itself.
- Snapshot the server before major upgrades.
- Change secrets immediately if you suspect exposure.
FAQs
Do I need my own domain?
Yes. A self-hosted Bluesky PDS depends on a domain or subdomain you control so clients can resolve your service and connect over HTTPS.
Can I run a PDS on a small VPS?
Yes, for personal use or light testing. A small VPS with 2 vCPU, 2 GB RAM, and SSD storage is enough to start, but more headroom improves updates, logging, and growth.
Is Docker required?
The official deployment path commonly uses containers, and that is the safest route for most admins. Follow the installation method documented by the official project you are using.
What is the biggest risk of self-hosting?
Operational mistakes are the biggest risk. Expired certificates, bad backups, weak secrets, and skipped updates cause more trouble than the installation itself.
Conclusion
Hosting a Bluesky PDS works best when you keep the setup simple, secure the server early, and treat backups and updates as part of normal operation.